Friday, 29 January 2016

Spray on nail polish

Spray on nail polish

Is Spray on nail polish the next big thing

Would you use Spray on nail polish

Could Spray on nail polish be the way to go in the world of nails.  There have been all sorts of different nail techniques and products over the last few years, such as shellac and gel polishes, colour changing polishes, one coat polishes and many more.  So will the spray on polish take off and be the next big thing.
How does it work?
It works by only adhering to your base coat and not your skin. You would apply your base coat using a brush as usual then spray on the colour (make sure you protect the surface you are working from) but don’t worry about getting it over your fingers.  You can then apply a top coat which will make it last a little longer, roughly about 4 days but this is not essential.  After the polish dries, you can simply wash your hands with warm soapy water and the extra polish will just rinse off your hands like magic.
It means that for anyone that usually makes a mess when their doing a home manicure, which is most probably plenty,  they will instead have perfect nails every time.
This new product does sound very easy to use, but how long does it last?
It will only last a couple of days without the added top coat and about 4 days with top coat.  With all the gel polishes about that last alot longer, you may not be crazy about this but for a quick fix it would be great.
There are currently only 2 colours available and the spray on nail polish is only available from one company at the moment, but if it takes off then we are sure it will become more widely available.  It has launched in the U.S but does not become available in the U.K until March 2016, so not long to wait.
So what do you think, could Spray on nail polish be the next big thing in the nail world.

Tags: 

Monday, 25 January 2016

Understanding Colour Correctors and what they are used for

Understanding Colour Correctors

Today we are looking at Understanding Colour Correctors

Understanding Colour Correctors  how to use them but more importantly, perfecting your concealer technique. Colour correctors can make you feel intimidated especially when staring at  multi-coloured concealer palette,  In the beauty  world  you may be constantly told t hat concealer is meant to match your skin tone exactly,  so when confronted with a palette of multi coloured colour correctors it’s easy to write off these peculiar-looking colors as face paint. But the truth is that if you master these colour correcting concealer palettes,  but using colour correctors will make a big difference to the way your make up looks.
The secret to multicoloured correctors is  colour theory. There’s a reason that your under-eye circles or post-pimple redness are always just a little bit visible under your concealer: the blue and red tones inherent in those blemishes shine through your flesh-colored makeup. In order to hide them properly, you need to neutralize whatever colour you’re trying to conceal, not just apply flesh coloured goop concealer  on top of it which is where the  colored concealers come in.
They normally come in 4 different colours, these are:
 Pale green – Green is opposite to red on the colour wheel, which makes them complementary colours. Complementary colours effectively cancel one another out,  who it comes to beauty,so if you put some green concealer on top of anything red (like rosacea, acne or scars), that redness is immediately neutralised.
Lavender concealer: – Purple is opposite yellow on the colour wheel, so pale purple concealer is good for concealing anything yellow or cooling down makeup that’s too warm-toned. Sallowness and hyperpigmented spots like acne scars can be effectively evened out with  using  lavender colour corrector before adding your regular concealer overtop.
Yellow concealer: Yellow is opposite to purple on the colour wheel, which means that dark, violet-toned under eye circles don’t stand a chance. Simply apply under your eyes and blend well with a sponge or concealer brush, then cover with powder in the same tone as your skin. This will lighten the eye area giving a dramatically contoured look,.
Pale pink/salmon concealer: If you have a darker or olive-toned skin, you’ve probably noticed that your under-eye circles aren’t purple or blue; they have a greenish tint, and yellow concealer don’t seem to be working  for you. That’s where pink or salmon concealer comes in—red and orange are complementary to green and blue on the colour wheel, so these shades are perfect for neutralizing your dark circles.
Hopefully our blog will help with Understanding Colour Correctors

Tags: 

Monday, 18 January 2016

Which make up brush is right ?


Which make up brush is right ?
Most people know what a makeup brush is but Which make up brush is right ?

Today we are going to be looking at Which make up brush is right ?

Knowing what a makeup brush is and Which make up brush is right ? Are two different things, we are going to be having a look at how to tell if a makeup brush is a good brush and how you know if you have the right size and type of brush for what you want to do.

Quality of the brush!

Before you buy any makeup brushes you need to know what you are looking for, and if they are worth the investment. Avoid buying brushes that are sealed in blister packs as you can not tell if they are good quality. To test  if a makeup brush is good quality you need to run it over your skin your hand will do. You should also run the bristles through your fingers to check if there is any shedding, it is also important to hold the brush in your hand as it need stop feel comfortable and it easy to manoeuvre.

Size of the brush 

The brushes that you get in makeup compacts are quite often too small  and narrow to be able to apply the product  probably. You are better off throwing them away and buy a brush designed for proper application.

Natural Bristles

Natural brushes such as squirrel, goat,pony and sable are very soft. These brushes make it easier to blend and give a natural look. They work best with powder based products such as blush, powder,and powder eye shadows.

Synthetic Bristles

Synthetic brushes are best used with creamy products such as concealers, gel liners, and lip colour, foundation and cream eye shadows. The bristles are generally stiffer than natural hair which gives you greater control and more precise application.
It important to know Which make up brush is right ? Before buying any.

Tags: 

Thursday, 14 January 2016

Vitamins and your skin

Vitamins and your skin

Today we are looking at Vitamins and your skinVitamins and your skin

Vitamins and your skin and how they benefit you

In today’s blog we are looking at Vitamins and your skin and the benefits they can give you.

There are many advantages to getting your vitamins in your food rather than in tablet form.  The fresh fruits, vegetables and whole grains that provide fiber also naturally deliver vitamins and minerals and are low in calories.  It is virtually impossible to have dangerous amounts of vitamins or minerals through your diet alone. Some vitamins are great for your skin inparticular, you could call these beauty vitamins.
Below is a list of the vitamins that will benefit your skin and where to find them-
Vitamin A- Antioxidant, essential for the growth and renewal of new skin cells.  Topically applied it may boost collagen production and promote skin cell turnover. You can get your vitamin A from egg yolks and dairy products.
Vitamin B- Increases fatty acids in the skin, promoting exfoliation and firmness.  You will find this vitamin in yeast, eggs, liver and vegetables.
Vitamin C- Building block of collagen, the protein that gives skin its structure, tone and elasticity.  Vitamin C will be found in citrus fruits, broccoli, peppers, berries and tomatoes.
Vitamin D- Essential for the development of skin cells.  Egg yolks, salmon, fortified milk and other dairy products contain vitamin D.
Vitamin E- Antioxidant that helps build and maintain healthy skin tissue.  Vitamin E is found in wheat germ, leafy greens, nuts and whole grains.
Fat- is also an important nutrient for the skin and the health of the whole body.  To have supple skin and soft hair fat is necessary.  To make sure you are getting the correct fats you should have unsaturated fats such as the monounsaturated fats found in olive oil and avocado and add some fatty fish to your diet as it contains omega 3 fats, seeds are also a good source of fat.
So Vitamins and your skin definitely go together, with one the other will be much healthier.

Tags: 

Wednesday, 13 January 2016

Today we are looking at Contouring your eyes


Contouring your eyes

You can change how your eyes look just by Contouring your eyes

You may have heard all about face contouring but did you know that there is also Contouring your eyes which is as affective a as facial contouring. We will be looking at different ways you can change the way your eyes look purely by contouring using eyeshadow.
Deep set eyes - need to be bought out by using a light to medium shades of eye shadow. If you use colours that are too dark it will recede and make the eyes look even deeper.
Wide Eyes will appear closer by using an eye shadow two shades darker than the foundation shade applied to the corner of the inner eye. If you are planning on wearing eyeliner thicken the line a bit at the corner of the inner eye and do not extent the liner past the outer corners,
We will be adding more tomorrow on this.
To make your eyes look more oval  you should apply your eyeliner to both the top and bottom meeting at the outer corners. Then contour shadow from the lash line along the eyeliner and into the crease.
To make  large eyes look smaller - use a soft eyeshadow colour as a liner on the lower lash lineman sure the shadow is several shades lighter than the colour you use o the top liner.
To make your eyes look less puffy - apply contour shadow at the outer corners and blend it as you move toward your nose
You can use the same contouring kit for both face and  when Contouring your eyes or use matt eyeshadows if your contouring kit is creamy or waxy

Monday, 11 January 2016

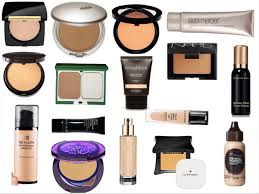
Different foundation formulas

Today we are looking at Different foundation formulas

Did you know that there are lots of Different foundation formulas

There are lots of Different foundation formulas and we going to have a look and them and what type of skin they are best suited:
Tinted moisturisers – are for normal to dry skin, They give a sheer light weight cover and are a an alternative  to foundation
Tinted face balm – Is best suited to very dry skin this also give a sheer coverage as well as hydrating the skin and giving a dewy finish.Balm plumps the skin and reduces the appearance of fine lines
Stick Foundation – for all skin types except oily skin. it provides easy spot coverage and  is also build able for medium to full coverage good for photo’s
Liquid foundation –  For dry to extra dry skin. Hydrates and smoothes proving  medium to full coverage
Moisturising compact – for dry to extra dry skin. Hydrating formulas provide  medium to full coverage.
Whipped foundation –  This is for combination skin and is great for skin with texture and balances the skin by hydrating dry area and absorbing the oil in the T-Zone this also provides medium to full coverage
Oil free foundation – for oily skin for combination skin in the summer a sit absorbs oil and smoothes whilst providing light to medium coverage
Oil free powder compact –  for oily skin this provides medium to full coverage and is great for top ups.
Mineral Powders – This great for all skin types but particularly oily but be careful as oily skin can change the colour of the powders which lead to the skin looking dry and pasty
We hope you have found todays blog on Different foundation formulas useful

Tags: