Monday 30 December 2013

Grooming ideas for men

We are going to look at Grooming ideas for men

Here are some Grooming ideas for menGrooming ideas for men

Men and make up are an odd combination but we are not really talking about lipstick and eye shadow, we are talking about Grooming ideas for men.
All skin products come under the banner of cosmetology which covers make up, skin care, hair product and many more.
Most men’s skin could use a little evening out every now and then. If women are expected to hide their flaws with makeup, men should feel like they can do something to look their best, too. The purpose of makeup is to enhance your natural beauty. Hiding imperfections is a part of that process. Yet, where should a man draw the line?   When looking for products for men, what you are looking for is under the heading of Complexion Enhancers for Men, and not under makeup.
John Paul Gaultier has bought out  six items of complexion enhancers for men, consisting of two types of bronzers, lip balm (tinted and clear), lash and brow tint, and an Eyeliner/Concealer double ended stick, which is actually a very useful dual purpose product for anyone’s toiletry bag. The packaging is slick and mostly black. It seems like most makeup for men is focused on heavily bronzed skin and soft lips.
As well as using products to enhance your complexion you need to remember the canvas and take good care of it by keeping your skin hydrated and moisturised.  An after shave balm is important to protect the skin after shaving.
As we have said don’t be put off by complexion enhancers for men, no ones asking you to don on the false lashes just take on board our Grooming ideas for men.


Tags: 

Saturday 28 December 2013

The difference between dry skin and dehydrated skin

How can you  tell The difference between dry skin and dehydrated skin

We are going to explain The difference between dry skin and dehydrated skin

Doses your  skin feel tight, itchy, or just dry? You may think you have justed started having dry skin but it could be  that your skin is dehydrated and no they are not the same we are going to talk about  The difference between dry skin and dehydrated skin.It’s time to take a long, hard look at what might actually be going on with your flaky skin, there are important differences in the causes of your dryness that can help identify the correct to treat the issue. It may be that you have been treating dry skin instead of dehydrated skin (or vice versa) and using products that won’t tackle the underlying problem.
Dry skin vs. dehydrated skin
Lets begin by explaining some basic science to you,there are numerous layers of water-based cells that make up our skin. An acidic mix of oily lipids and waxes, mostly sebum and sweat, protects the top layer of skin. Dry or dehydrated skin becomes an issue when the top layer, the stratum corneum, is damaged. How this top layer is left vulnerable is what differentiates dry skin from dehydrated skin.
Lets have a look at dry skin first- dry skin is a skin type that is caused by a lack of skin lipids and sebum, due in part to under active and smaller sebaceous glands. Less protective oil in the skin cells leaves a tight, scaly and sensitive sensation. A common problem among mature skin, dryness can be caused by an under active thyroid, a hormone imbalance or untreated dehydrated skin, all of which inhibit the production of the essential oils that protect the skin. This type of skin need plenty of moisture but don’t apply creams to that are too oily rather use water based products such as lotions rather than creams  to use all the time and keep creams just for night.
Dehydrated skin is a skin condition, which  means it is temporary and more easily treatable than dry skin. Often dehydrated skin is caused by external elements, such as weather or harsh soaps, dehydrated skin is simply moisture-deficient skin with low, depleted water content. All of our cellular processes that occur in our bodies depend on water. If we don’t have enough water in our body, we starve our skin of moisture, which makes it vulnerable to the outside elements. Dehydrated skin  can be caused by over exfoliating, poor diet (i.e. not eating enough water-rich vegetables, or too much caffeine and alcohol intake specially in the festive season) , stripping cleansers, cold weather, sun exposure and other environmental factors.
So how can we treat it?The issue with dry skin is based on a lack of protective oils, replenishing and substituting for that layer is the best way to treat and relieve dryness. Rich creams, masques, butters and essential oils will help replenish that layer, but you also need to eliminate harsh, stripping cleansers and give your skin the opportunity to produce and use that sebum and sweat layer.Using rich cream that are oil based rather than water is helps the skin start to replace some of the lost oils avoid washing your face in the morning but apply a good toner to bring your skin back to its natural ph balance and then apply the moisturiser  all this aids in replenishing the skins natural oils. and by making  sure your eat plenty of fruit and veg and drink water and reduce any caffeine or alcohol drinks all  this will rehydrate your skin.
The difference between dry skin and dehydrated skin is not that marked, which why we get confused.
Why not try  a facial at http://bbeautiful4u.co.uk/facials/

Tuesday 24 December 2013

Best Brows for your shape face

How to find the Best brows for your face shape

We are going to help you find Best brows for your face shape. Just drawing on any shape eye brows can look  very strange  or look like they just don’t belong there here are some guides as to what shape eye brows you should have for your shape face.
Eye brows can either make or break your entire look, with so many options–thick, thin, arched, straight–how do you know which brow is right for you.
First of work our what shape face you have, if you are not sure look in the mirror and compare with one of these drawings  you may find that your face is combination but pick the more obvious shape if that’s the case.Best brows for your face shape
Once you have decided what shape your face is you can look at the best shape eye brows for your face.


  • eyebrows-for-square-faceSquare faces –    as the square shaped face is a very strong face . you can either have a very thick bold eye brow to balance out the jaw line or go so a softer curved brow to balance the face better, try using  an angled brows create this balance. Don’t make them too rounded as it will look funny

  • best-eyebrows-for-long-face-shape1 (1)Rectangle faces –  because rectangle faces are long the best shape  eye brow shape for this face is quite straight this makes the face look not as long,. Don’t make these eye brows too angles as will only make the face look even longer remember to keep the arch low.

  • best-eyebrows-for-oval-faceOval faces - This is considered the ideal face shape. The brows play no role in making the face appear more oval -it already is oval. The best t eyebrow shape for ovals faces is the  soft angled eyebrow shape. The soft angled shape goes straight up and then gently curves round at the top and down.

  • best-eyebrows-for-heart-face-shapeHeart Faces –  Use rounded brows.  for a heart shaped face the curve of the brow is soft, feminine and attractive. A using  low arched rounded brow creates a natural look, while a highly arched brow can add length to a shorter heart shaped face or create a dramatic look.

  • best-eyebrows-for-round-faceRound Faces –  to make round faces appear longer consider using a  high arched brow shape that  follows a straight line to the peak of the brow, and creates more vertical lines. Stay away from a rounded brow shapes especially if you don’t want to enhance the shape of your face  be careful of making them to angled a softer angle looks the best.

  • best eyebrows for diamond shape faceDiamond shape face – the curved brow shape will both soften your look and  make the widest portion of your face look less wide. Try not yto make them too staright as this will enhance the width of the forehead.

These are the main  face shapes  and  hopefully have helped you  find the Best brows for your face shape
Eye brow shaping at bbeautiful4u.co.uk
http://bbeautiful4u.co.uk/shop/half-price-enhanced-brows/

Monday 23 December 2013

Applying Gel Eyeliner

Applying Gel Eyeliner can be tricky

As Applying Gel Eyeliner is tricky we are going to help yoApplying gel eyeliner

There are a few basic techniques to master when Applying Gel Eyeliner that can help you get your desired look.  The first thing you need to consider is the product that you will be working with. You should use a  gel eyeliner that is not too wet and not too dry. If it is too dry, you end up getting drag marks and your liner looks dotty and fragmented. If your liner is too wet you can smudge and end up with liner all over your face before it has time to dry.
You should test this on your hand before you buy to make sure it is not too dry or not too wet, it needs to be somewhere in the middle. The brush needs to  move easily and the liner should dry  fairly quickly, then you have the right formula. It is important to consider what type of applicator you will be using. There are some great gel liners that come in pencil form if you are at all uncertain about using a brush. Using a brush, however, does give you a bit more control over the product. If you choose to use a brush, you should use a tapered one as an  angled brush does offer a bit more control.  When using a brush you want to rest your pinky just below your eye on your cheekbone for added stability.
Start from the centre of the lid, you then need to work your line out to the corner of your eye. After you have the outer half of your eye lined, you need to work from the tear duct area to meet the line that you have already drawn.
If you mess up, don’t worry too much get, you can always thicken the line to cover up any imperfections or simply clean it off and start again.
When Applying Gel Eyeliner practice makes perfect.

Saturday 21 December 2013

Would you like to Speed up your make up routine

Speed up your make up routine

Speed up your make up routine in no time

Speed up your make up routine

If your in a hurry and running out of time to do your make up then try these time saving tips to Speed up your make up routine.
Try keeping eye liner and mascara to the top upper lash line and lashes and try skipping the bottom. This can appear more natural looking for daytime wear anyway.
Anything that can be applied quickly with your fingers will save the time. Cream blush and eye shadows are great time savers.
Neutral and medium intensity colours don’t have to be as precise as darker colours and darker colours take more time to apply. It’s much easier to swipe on a quick coat of pale pink nail polish than to do a deep red.
Dual products are your friend. If you can use it on more than one feature, it’s one less product you have to use.
Foundation products that dry to a powder finish also mean you don’t have to set with powder, eliminating that extra step.
You can also save time by having lash extensions and a spray tan as these both give a made up look without having to apply anything extra at all, you can just get up and go and feel glam too.  Keep the spray tan light and don’t go for the really long lashes as this will then keep it a daytime look.
These tips will hopefully help you to Speed up your make up routine in no time at all.

Friday 20 December 2013

Look your best in photographs

Do you want to Look your best in photographs

Look your best in photographs

Here's how you can Look your best in photographs

Everyone likes to look their best in photographs so here are some tips on how you can Look your best in photographs.
If you want to wear your glasses in photo's make sure the photographer angles the lens so you won't get a glare.
If you want to make your nose look smaller then try shading, apply your foundation and your powder as usual, add a little bronzing powder to the tip of the nose, this will give the illusion of the nose being smaller.
If you are getting your picture taken then you will want to use a "photo friendly foundation", such as bare minerals or smash box, these are great for photographs.
Mattes are flat colours, they don’t have any sparkle or shimmer. When you're going to be photographed you want to avoid anything that is going to reflect light on your face. The camera flash and the added shimmer will leave you looking like an oil spill and not your beautiful self.
Many experts that give advice on how you can look beautiful and fantastic in pictures suggest using black liner and black mascara. If you normally use browns, opt for black instead, the darker hue will give you better contrast and contrast will make your eyes pop more.
For best results apply your make up in natural light, indoor lighting can alter the appearance of your make up and some lights may wash you out causing you to apply make up too heavily.
Now you can be ready and Look your best in photographs.

Thursday 19 December 2013

Make up to wear whilst in labour

The best Make up to wear whilst in labour

Here are some tips on what Make up to wear whilst in labour

For some ladies leaving home without their make up is like leaving home without your shoes so we are going to tell you what Make up to wear whilst in labour. If you’re an expecting mother and also a make up fiend, here’s a tip, pack your make up bag in your hospital bag so you’re prepared and make up ready for labour and the all important first photo’s with your precious new born.
Here are some tips on what to pack in your labour make up bag-
Waterproof Mascara - Those tears of joy will come when they place your beautiful baby in your arms, so you want to be ready.
Cream-Based Eye Shadow - This also needs to be waterproof, and usually won’t budge until you remove it with make up remover. Choose a soft bronze shade because it will add warmth and colour to the eye area without looking overdone and stick with just one colour.
Waterproof Eyeliner - Just a little on the top lash line for definition, you want your eyes to show up in all the pictures everyone is going to take of you with the baby.
Cheek/lip Stain - This is great on lips too for a radiant Mum glow, even when you have been pushing for hours and there is still no baby!
Your Favourite Lip Balm - Because your lips get so dry during labour, it’s the one thing you should keep next to your hospital bed.
Forget the Foundation - It’s just going to rub off during labour!
Make up to wear whilst in labour
Not everyone would worry about make up but if you do then this should help you to know which Make up to wear whilst in labour.

Tuesday 17 December 2013

How is chocolate good for your skin

You may well ask How is chocolate good for your skin

We are going to explain How is chocolate good for your skin

We are going to look at How is chocolate good for your skin and how it can help in other ways as well, if you think one of the secrets to radiant skin is avoiding, chocolate  you are in for a big shock. not only will it not give you acne  chocolate can actually  be beneficial to your looks.
Can you now go and eat loads of those  no, you can’t get away with eating cheap, sugary milk chocolate bars, but high-quality unsweetened cocoa is high in antioxidants called cocoa flavanols, which can be good for our skin. One study has shown regular consumption of chocolate rich in flavanols can protect our skin from harmful UV rays.  which if your not sure which type of chocolate we are talking about its  dark chocolate which can reduce body mass, prevents blood clots, improves numeracy,  it may prevent cancer, and doesn’t ruin your complexion.
So still not the best news  if you don’t like dark chocolate  but its a start at least but its not all bad chocolate has been found to have lots of benefits on the human body.
So here’s  all the good stuff you may not have know about the benefits of Chocolate;
  •  Chocolate contains flavonoids, whose antioxidant properties help fight strokes,
  • Chocolate prevents blood clots, which in turn reduces the risk of heart attacks. Blood platelets clump together more slowly in chocolate eaters.
  • About 6.7 grams of dark chocolate per day keeps the blood inflammation-inducing proteins away.
  • University of L’Aquila, in Italy, found that eating chocolate increase insulin sensitivity  which reduces the risk of diabetes
  • Chocolate contains  theobromine,  this seems to reduce the activity of the  vagus nerve, the part of the brain that triggers coughing fits.
But don’t just start binging on chocolate!  Because you will still gain weight as most of the chocolate you buy in the grocery stores are  heavily processed, which means that it has lost many of its healthy chemicals. Not to forget that  some of the research supporting chocolate’s healthy characteristics was paid for by chocolate manufacturers.
So yes it does have some good qualities but  it still has lots of bad ones too   so eat with in moderation.
We had lots of fun researching  How is chocolate good for your skin and we hope you enjoy reading it.

Monday 16 December 2013

Different types of eye shadow

There are lots of  Different types of eye shadow 

We are going to look at  Different types of eye shadow

Eye shadow is an important part of your eye make up that will help to intensify or soften your look, create desired mood and also improve your eye shape, knowing the Different types of eye shadow can make all the difference to your look.
Matte Eye Shadow: Matte shades will create a natural look. Matte eye shadow has a higher concentration of colour and is an excellent choice for shaping and defining the eyes. Matte eye shadow are more suited to mature skin.
Shimmer Eye Shadow: Shimmer eye shadow will give you sheer coverage with a hint of sparkle. Shimmer eye shadow comes with many glamorous colours and suitable for women of all ages and skin types. Light shimmery colours are often used to highlight the eye area. If fine lines and wrinkles are a concern, shimmery eye shadow will not settle into your fine lines.
Satin Eye Shadow: Satin eye shadow has a little more sparkle than a Matte but less sparkle than a Shimmer. Satin eye shadow can be used by people with all skin types, may it be youthful or mature skin.
Cream Eye-shadows are not very popular. This is because the textures are difficult to work with and hard  to blend. The creams  tend to crease and settle within any creases on top of the lids, as well as move around on the eyelids after a short amount of time.
These are some Different types of eye shadow, you can get all of these in a vast range of colours.

Sunday 15 December 2013

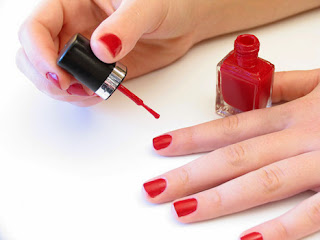
How to paint your nails

How to paint your nails

How to paint your nails easy right?

Painting your nails so they look great is not easy this why we are going to show you How to paint your nails

You either love painting your nails or just don’t bother because you think you are rubbish at it,the fact is that most of us do it wrong. So  we are going to tell you How to paint your nails not so they just look nice but so they look great.
First things first where you paint your nails is important, if you paint them with a magazine on your lap whilst watching tv  they are never going to look great supposing that you haven’t painted your finger as well as the nail you;ll probably smudge them  when you think they are dry, so you end up having to start all over again anyway.
Here are a few guide lines to help you get it right:
The work area.
  • When painting your nails you should do it when there are no distractions so wait until kids  and husbands,partners are either at school/work or asleep.
  •  Make sure the the room it well lit preferably with natural light if possible.
  •  Use a flat clean clutter free surface that you can sit atcomfortably if you are fidgeting  because you are trying to get comfortable your going to make mistakes.
  •  Put some kitchen towel or paper on the surface, so if you knock anything over its not going to be a big problem clearing it up.
Equipment you will need
  • Acetone free nail varnish remover
  • Cotton wool pads
  • Cotton wood buds
  • Nail scissors or clippers
  • Nail file
  • Cuticle cutters
  • Cuticle pusher
  • Cuticle oil
  • Base Coat
  • Nail Polish
  • Top Coat
  • Quick dry Spray
Preparation 
The way your nails will look great is all in the preparation, you could just paint them but if the cuticles have grown up or you have hang nails ( this is the annoying bit that seem to appear from no where at the side of your nail) they still are just going to look ok  so take some time in tidying them up  first.
  • Remove any nail varnish using the nail varnish remover if your nails are already painted.
  • Start by pushing back the cuticles if they are dry apply some cuticle oil on them first and leave it it soak in or soak your nails in warm water first. before doing this bit.
  •  Using the cuticle cutters cut only the  excess  cuticle away> Do not cut the cuticle this is to protect the nail base cutting it away may lead to nail infections.
  •  Shape the nail cut if  necessary.
  • Using the nail polish remover and cotton buds wipe over the nail this cleans the nail and  removes any surface oil so that the nail varnish sticks probably.
You are now ready to paint
When painting the nails it is important that you do not apply to much or too little polish,  this is important for all stages of painting your nails as too much paint means they take a long time to dry and too little and you run the risk of it looking patchy no matter how expensive the polish is.
  • When you start painting start with the little finger to the thumb and do the same on the other hand that way by the time you get to the next coat the first finger you painted will be dry
  • When applying the base coat  make sure the brush is covered but not dripping and apply to the nail in 3 strokes starting from the base of the nail just above the cuticle (don’t paint on the cuticle as this just looks messy) and paint upward to the free edge (white bit of your nail) if you have broad nails 4 strokes is expectable.
  •  leave this to dry for about 30 seconds
  • Then apply the  your coloured nail polish, apply the same way you did the base coat, if you catch the edges or your skin  wipe off with cotton buds dipped in nail polish remover  straight away as its easier to remove because the polish is still wet.
  • Leave to dry for 60 seconds
  • Then apply a second coat
  • Leave to dry for 60 seconds
  • Apply the top coat
  • Leave to dry
  • You can use  a quick dry if you have it if its a paint on  you still have to wait 60 seconds otherwise you  ill drag the polish.
  •  If you didn’t know that Base coat protects your nails from staining and top cat makes your polish last longer.
We hope  your nails now look great  and you now know How to paint your nails

Friday 13 December 2013

Is night cream a must have

Is night cream a must have or just a myth

Have you ever wondered Is night cream a must haveIs night cream a must have

Here today we are going to answer the question Is night cream a must have.
None of us want to speed up the process of aging and we all want to protect our skin as best we can from severe weather conditions and just day to day living but with so many products to choose from, many of us are left asking whether spending money on a separate night cream from the moisturiser that we use during the day is essential. So we are going to look at the difference between the two and find out if  we all need to use a separate night cream.
First of all it depends on our skin type as  different skin types require different products and our skin's needs change in differing environments.
Night creams often contain higher levels of ingredients such as retinol and vitamin C, which help to boost skin repair as well as moisturising it. We've all heard of beauty sleep, well this is it in a bottle.
Day creams mainly focus on protection from UV light, pollution and hydration, acting as a sort of protective barrier from external elements, night cream focuses on repair.
Whilst you wouldn't do your skin any harm by wearing day cream at night and vice versa, you obviously don't need an SPF when your in bed.  Also, some of the active regenerating ingredients in night cream can either be broken down by UV making them less effective or can make your skin more sensitive in the sun.
It does all come down to skin type and is really important that you know your skin type when deciding on night creams, Oily skins can get away without using a separate night cream, while drier types definitely need a separate cream because their skin will desperately need additional moisture after effects of a day outdoors travelling to and from work, or even just sitting at home.
Serums are becoming more popular these days and  not only are these concentrated little solutions supposed to offer even greater anti-aging care, they are also really excellent options for boosting skin's moisture levels when worn under cream at night.
So Is night cream a must have for you, hopefully you now have a better understanding of this now.

Thursday 12 December 2013

How to Use an Eyelash Curler

Have you ever wandered How to Use an Eyelash Curler

We are going to give you some tips on How to Use an Eyelash Curler

Curling eyelashes make your eyes look wider & brighter if you have ever wanted to give  it ago here are some helpful tips on How to Use an Eyelash Curler.
Metal eyelash curlers are better than plastic metal ones are more hard wearing. For the  best results, you’ may want to gently  heat the curler with a blow dryer for no more than 5 seconds, by heating the curlers this will enhance the curl further.
  • Eyelash curlers work best on clean eyelashes. Make sure eyelashes are free from mascara. If necessary, use eye makeup remover to remove old mascara.
  • When heating the curlers make sure the blow dryer is on a low setting but obviously not the cold one! test the curlers to make sure they are not too hot by touching them with your fingers (not your face) if they are too hot then let them cool down for a few seconds.
  • Open the curler, clamp lashes close to the roots, hold for 10-30 seconds,  never curl lashes after you apply mascara as the mascara dries, lashes can stick to the curler & be torn from the roots. Don’t bother curling bottom lashes.
  • After curling eyelashes on both eyes you can then apply mascara if you wish to.
  • Do not curl your eyelashes everyday as this will weaken the eyelashes and cause them to break or make them full out prematurely.
So you now know How to Use an Eyelash Curler so why not take the plunge and have a go.

Wednesday 11 December 2013

Eyeliner Tips

Eyeliner Tips

Eyeliner TipsThere are lots of different Eyeliner Tips

Applying eyeliner  well is a skill,  we are going to tell you some Eyeliner Tips to make it easier.

Being able to draw a straight line with eyeliner is just the start of having perfect eyeliner, we are going to give you some Eyeliner Tips that will not only make your eyeliner look great but stay on as well.
Always apply  your eyeliner in a well lit room with a good clean mirror,
How to draw a straight line!
  • Stand  approx 6 inches away from a mirror and tilt your chin up, so that when you look down your nose into the mirror, you can see your entire eyelid. Apply concealer or dust translucent powder on your upper lids and blend well with a sponge or lightly pat with a fingertip to cover veins and prevent creasing.
    Before applying liner, determine your eye shape. If eyes are close-set or round, line only the outer corners. Otherwise, rim the entire upper lid.
  •  If you are using a pencil soften the pencil top by rolling it between your fingers.
  •  Gently pull your eyelid taut at an upward angle, beginning at the inner corner, draw small, connected dashes along the top lashes. Be sure to stay close to the roots so there is no skin visible between the lashes and the liner. To make eyes look bigger, extend the liner slightly beyond the outer corners.
  • Apply a matching powder shadow on top of the liner to keep it from rubbing off, again keeping it close to the lash line.
How to make your inner lower eyeliner last!

You have just lined your eyes but half way through the day you have to apply it again this is because our eyes are meant to stay wet, so the pencil that we’ve traced along our inner rims is constantly rubbing against our wet eyes every time we blink. which can be really annoying.We found this tip to help the eyeliner stay on longer:
  • Using a black kohl or kajal liner which it’s waterproof and creamy,
  • Trace round your waterline the black kohl or kajal liner. Blink your lids together to get the product on the upper waterline as well as the bottom.
  • Dip a stiff angled eyeliner brush into a matte black eye shadow. Tap it a few times to remove any of the excess product, then Press gently all along the waterline, directly on top of the original kohl liner. Make sure you really work it into the line that’s in between the waterline and the lash line,make sure there is no skin colour visible.
This tip helps to keep the liner on for a few more hours.
How to make your eyelashes look fuller with liner!
If you really want a defined eye, trace the upper inner rim of your eye with a waterproof eye liner to make your lashes look that much fuller, and to help define the shape of your eye. Using a soft Kohl pencil gently pull your upper lid up and using the kohol pencil draw along the inner rim make sure you use water proof otherwise it will just come off as quick as you put it on then apply your mascara.
We hope you have found these Eyeliner Tips helpful

Monday 9 December 2013

Ways to quick dry your nails

There are a few Ways to quick dry your nails

Here are a few Ways to quick dry your nailsWays to quick dry your nails

As we have said there are a few different Ways to quick dry your nails.
Ice water- When you need to paint your nails in a hurry but don’t want to sit around waiting for them to dry, let them air dry for a few minutes. Then submerge them in ice-cold water for three minutes, this can be achieved by putting ice cubes in a bowl of cold water. This should be enough time for the nail polish to harden and give you dry nails!
Quick dry stray- After painting your nails leave them for about a minute, then spray them with a quick dry spray which you can purchase from your local chemist.  Be aware that some of these sprays can create a lot of mist so maybe if you suffer from respiratory problems then this is not for you.
Quick dry drops- Once you have finished painting your nails, apply a drop of quick dry to each nail, being careful not to touch the nails.
Quick dry paint- Only apply the quick dry paint on once your nails have dried for 2 minutes to avoid dragging the polish.
We have found that the best one for us is the quick dry spray and the least effective has proven to be the quick dry paint as you have to wait the 2 minutes and still do run the risk of  dragging the polish, which is very annoying.
These are the only Ways to quick dry your nails that we know, if you have any then please let us know.

Sunday 8 December 2013

Skin treatments you can afford

Skin treatment you can afford
Everybody wants to have nice skin, but is it really necessary to spend a fortune on pricey beauty  pbeautyproducts to get it?
You may be surprised to know that the answer to that question is a resounding NO! The fact of the matter is, there are a lot of common, everyday household items that you can use to enhance your skin
A good way to tighten your facial skin and minimize wrinkles without paying an arm and a leg for an expensive facial masque product or plastic surgery is to put Pepto Bismol on your face. Just wash your face with a mild cleanser and rinse with warm water. Apply Pepto Bismol with a cotton ball or your fingertips. Let it sit for about 15 minutes then rinse it off with warm water followed by cold water. Moisturise with aloe vera gel if desired.

Saturday 7 December 2013

Quick fiX beauty tips

Here are some Quick beauty tips

Running out of time or have run out of a product here are some Quick beauty tips to help with that emergency;

RUN OUT OF SHAVING FOAM?
How many times have you been in the shower, and wanted to shave your legs, and realize you’ve run out of shaving cream? Not to worry! You can use your hair conditioner as a substitute. It’s thick and nourishing and can even leave your legs feeling soft afterwards. Just apply like you normally would the shaving cream, and start shaving!
MOISTURISER IN AN INSTANT!
If you find yourself having to deal with dry patches on your elbows and knees and don’t have any moisturiser on hand, head to your kitchen and grab that bottle of extra virgin olive oil. It can do wonders for your skin as a natural moisturiser.
SMOOTHING OUT THE BUMPS!
Why not try a thermal and ice facial splash the day before a party to solve last-minute complexion problems
Add a couple of drops of lavender essential oil to a bowl of hot water (not boiling) and a couple of drops of lemon essential oil to a bowl of iced water. Soak a flannel in hot water, wring it out and press on to skin. Breathe deeply for three seconds then repeat with a cold flannel. Continue this process for one minute,the rotation of hot and cold helps to minimise the appearance of pores and blemishes and brightens the face
MASCARA CLEAN-UP
How many times have you been applying mascara when your in a hurry and you get it on your eyelid, under your eye, or even on your nose? When this happens, don’t flip out! Just let it dry naturally. Don’t attempt removing it while it’s wet. It just makes it messier! When you’re all done with your mascara application, use a clean/dry cotton swab to easily flick off the dried mascara that’s made it onto your skin.
These are just a few of the Quick beauty tips there are out there we will at some others at a later date.

DRY YOUR NAILS QUICKLY!

 You decided to paint your nails before going out but don't have time to wait for them to dry! After painting them, let them air dry for a few minutes. Then submerge them in ice-cold water for three minutes. This should be enough time for the nail polish to harden and give you dry nails!